Memories Mixed Media Wall Display with Smoothfoam®


SF Memories MM board 4

I have been on a mixed media spree of late and Smoothfoam® is an amazing surface to create on. Today I am using the 1x6x12" Smoothfoam Sheet as my base.


SF Memories MM board 1


I started by gluing a layer of chipboard to the Smoothfoam® and then painting the entire surface with a coat of DecoArt Gesso from their Media Line.


I am so happy to be a member of the DecoArt Blogger program! I absolutely love their products - there are so many ways to use them and they never fail to give me the results I want!

SF Memories MM board 2


Add the second layer of chipboard and coat this with gesso as well. Let everything dry well.

SF Memories MM board 8


I began layering color on by using . After that I added fluid acrylics, then let those dry. My last layer of color was the Metallic Lustre - I added bits and pieces of color all over the piece randomly.

SF Memories MM board 5


I added Crackle Glaze to a few of the pieces for some visual interest.

SF Memories MM board 6


Last up I added accents on one piece of the chipboard using Liquid Glass. When dry I accented it with Metallic Lustre.

Supplies Used:
Smoothfoam® 1x6x12 Sheet
DecoArt Media Line:
   *Media: Gesso / Crackle Glaze / Liquid Glass
   * Fluid Acrylics: Titan Buff / Diarylide Yellow / Yellow Oxide / Metallic
   *Shimmer Mists: Turquoise / Yellow
   *Metallic Lustre: Silver Spark / Lavish Green / Orange Flicker / Brilliant Turquoise
Chipboard: Technique Tuesday / Want to Scrap / Blue Fern Studios
Low Temp glue gun


Signature1

Mason Jar Lamp with Decorated Shade

I received the amazing Lighten Up kit from etchall® to work with this month and I was pretty excited. Who doesn't love to work with pretty things???  After doing some serious pondering, I decided to make use a Mason Jar for my lamp.


One of the easiest ways to etch is to use Class A' Peels stickers - they are great for etching. Check out the selection available on the etchall® website for some inspiration. Because I wanted to etch the negative of my design, I cut the whole sticker out and applied a small piece of etchmask Transfer Sheet to the top of the sticker. This allowed me to apply the sticker to the jar without distorting the shape! After removing the Transfer Sheet I weeded (removed) the parts I wanted to etch. Because there was so little material around the butterfly I added some masking tape to make sure I didn't etch anything by mistake.


Next up - apply the etchall® etching creme and leave for 15 minutes. Did you know that the creme is reusable? It is! When the time is up, scrape the excess creme back into the jar and use it again next time. Rinse the last of the creme away and dry. Remove the stencil and tape.


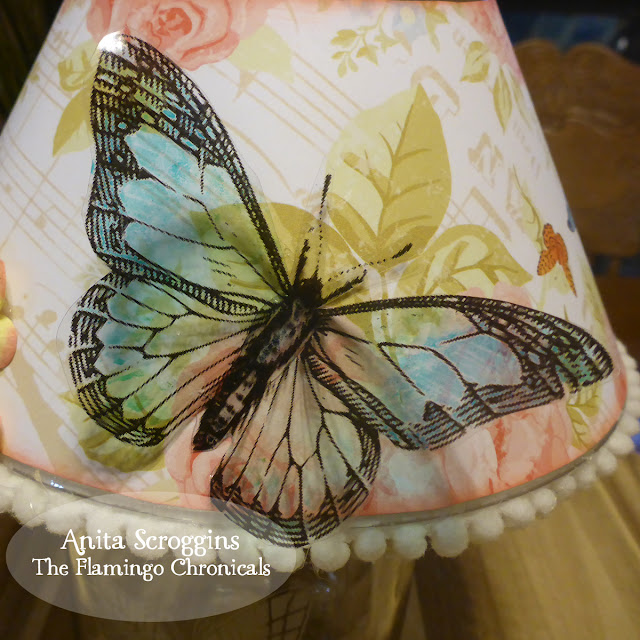
To decorate the lamp shade I removed the plastic panel from the shade, traced the shape onto patterned paper, and cut out.

I added this acetate butterfly from my stash. I colored the back with Tombow markers and let dry.


A few flowers finish off the design.


Re-Purposed Flower Bin using Joy Iron On Letters

Spring is still in the air here in North Texas and I love having fresh flowers in the house. I generally have them in every room and I am always on the lookout for new ways to display them. I picked these little metal bins up at Michael's a while back for another purpose but they didn't work out for that. I have been looking for something to use the for. BAM! I added some Joy Iron-On Letters along with some fun embellishments. Hello new flower pot!

I started with the container, a set of Eileen Hull dies, Aleen's Clear Gel Tacky Glue, and the Joy Iron-On Letters.

For this project I used one of the Baby Monogram Alphabet Sheets in white. (not shown, sorry!)


Because I couldn't iron these letters on, I simply glued them instead using Glossy Accents.


I cut a variety of flowers and leaves and layered them on the side, then added some interest with a white chalk pen.


I love the way this turned out - and the fact that I was able to use something that was taking up space in my studio!

Be sure to check out the Creating With Joy blog for lots of creative ideas using Joy Iron On Letters.


Craft Tilt Bin Wall Storage from Deflecto Crafts

This month I was very happy to receive in my box from Deflecto Crafts two more sets of the Tilt Out Bins. I received one each of the Craft Tilt Bin 5 Drawer and Craft Tilt Bin 6 Drawer. (There are two sets of each shown here, for a total of 4 sets.) I have long loved these storage bins and have used the for my Prima Breeding Program (see my blog post here for more on that)

I have recently acquired a good deal of paint and mixed media supplies. I was looking for a way to store them. I wanted them to be visible, and easily accessible, and close to hand when I wanted to work with them. Quite a tall order. By removing several of the actual bins from the units, I was able to get all of that and more.

I attached the 5 bin units to the wall using screws. Because the units are interlocking I was able to attach the more shallow 6 bin unit underneath. This allowed me to have a deeper "shelf" on the top for more storage! One of us is clever - I'm not sure it is me or the folks at Deflecto. Maybe both???

I utilized one of my Interlocking Storage Organizers to hold my paintbrushes and other tools. It fits perfectly right on top of the bin, next to my little Flamingo Garden.

 Deflecto products are available through local art, craft, and educational stores, in addition to online retailers such as Amazon.com, Scrapbooking.com, and Scrapbooking Made Simple. To find a local retailer, click HERE and enter your zip code to see where you can purchase Deflecto Craft products near you.

Be sure to check out the new Deflecto Craft Pinterest page for more Deflecto ideas.


Mini Light Up Heart Canvas


I recently received a Chibi Lights Kit from Chibitronics. I saw their amazingly cool stuff at CHA this year and have been dying to try it out! They were awesome and sponsored the Designer Crafts Connection April Blog Hop.  Here's a look at what I received.


The kit comes with enough supplies to make two or three small projects - or one big one. Plus a fun book to teach you how to create the circuits. As an engineer I was pretty excited by this!


I knew I wanted to incorporate the lights into an art project so I broke out a mini canvas and some fun supplies from DecoArt. Have you ever tried the Glamour Dust Paint???? It is awesome - you should check it out!

I gessoed, and painted, and dripped, and glittered. Then added my sentiment with a fine tipped pen. Then I created my circuit following the directions found on the Chibitronics website. This photo was taken with the lights off, and the photo at the top was taken with the lights on. I love the little glowing heart!

Enter to win your own Chibi Lights Kit by commenting here and on the Designer Crafts Connection blog, where you will also find the Rafflecopter widget to record your entries. The winner will be selected at random on April 29th.  There's also the list of designers participating in this hop, so check out their projects too.


Handmade Sachet for Mother's Day with Joy Iron-on Letters

Mother's Day is right around the corner and will be here before we know it. This year I am trying to stay ahead of the game and get my gifts done BEFORE the holiday arrives. Enter this amazingly cute Mother's Day Sachet.


I made a pattern using some scrap paper- I just folded it in half and cut a heart old school style. My fabric is a scrap left over from a painting canvas that I used for a party backdrop a couple of years ago.


I stamped the top layer using small scale stamps from my collection and StazOn inks. I colored my Joy Iron On Letters using a Stampers Big Brush Pen from Faber-Castell, then ironed on following the manufacturers directions.


I machine stitched most of the way around my heart using a straight stitch, stuffed with filler, then closed the opening. I added a velvet ribbon, flower, and leaves to the very top to finish it off.