Doggie Drool Towel using Joy Iron On Letters

My dog drools. A LOT. She is a regular drool monster, especially when we are in the car! I have been searching for some cute towels to carry around with us but couldn't find any I like. I decided to make my own using supplies I already had on hand.


My supplies are:


  1. Arrange letters as desired and iron on following the instructions found here.
  2. Sew ribbon to bottom of towel (or use fabric glue), turning the ends under to prevent fraying.
  3. Add grommet half way up side and insert Pear Clip. 
I am not so sure that my pup likes these as much as I do, but I am excited to use them the next time we go out.


    Texas Pinners Conference


    I am super excited to say that I will be teaching at the Pinners Conference in Arlington, TX in September!  I was over the moon happy when I saw that they would be coming to town.

    Are you going? If so be sure to use my code to save 10% on your ticket "ANITA" (not case sensitive). If you want to do some shopping, but not take classes, you can use this code "FREESHOPPING" to gain access to the trade show floor.

    I am teaching a Mixed Media Christmas Tag Class - I would love for you to join me!

    If you love Pinterest like I do - you will want to join in the fun! Don't wait- be sure to get your tickets now!


    Birthday Party Table Decor and Blog Hop

    Birthday Table Decor

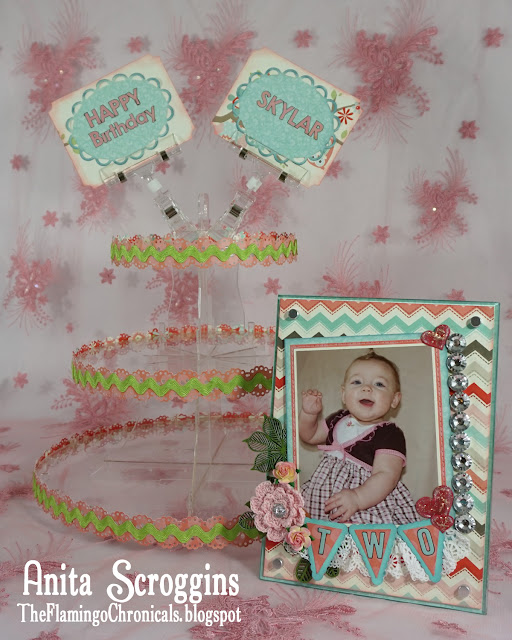
    It is almost time for The Princess's second birthday! I can't believe time has flown by so quickly. Today I want to share some fun table decor I made using the 3-Tier Cupcake Stand and 5x7 Craft Frame from Deflecto® Crafts. The cupcake stand is SO EASY to decorate! For this one I simply used a border punch to create strips which I adhered using double sided tape. On top of the border I added some fabulous rick rack from Decorative Trimmings - they have some beautiful trims, so be sure to check them out!


    We are having a fun blog hop with the team from Designer Crafts Connections and Deflecto® and of course there is a great prize up for grabs. Be sure to comment on MY blog and the Designer Crafts Connections blog. One winner will be picked to receive a 3-Tier Cupcake Stand!!

    Of course I had to show off a cute picture of the Princess on the table! My base is the 5x7 Clear Frame. Now, normally I would put my photo on the inside, between the two pieces of the frame. But I knew I wanted to put lots of things with texture around this photo so I adhered my base paper to the front of the frame instead. I used foam tape to pop the photo up then added lots of cute stuff around it!

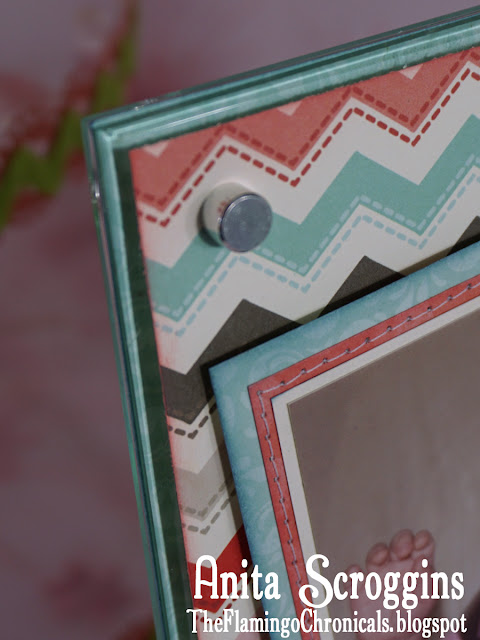
    Beveled edge craft frame from Deflecto

    These frames have a beautiful beveled edge - to enhance the look on this project I inserted a darker piece of patterned paper inside the frame which is slightly larger than the top piece.

    Birthday Banner and flowers

    I created a ruffle on the bottom of the photos using a paper doily and added the cute layered banner on top. The banner punch is from Stampin' Up, the little heart die cuts are from a Maya Road die.

    Crocheted flowers and embellishments

    This adorable crocheted flower was made by my good friend Sandy. I added some bling to the center and several pieces of embossed chipboard behind it.

    VersaGrip Sign Holder

    At the top of my cupcake stand I added two VersaGrip Wide Grip Sign Holders to hold my signs. I used some older Spell Binders dies to create the signs. This is a great way to personalize your projects and they are easy to change out.

    Deflecto 3-Tiered Cupcake Stand
    We are giving away a 3-Tiered Cupcake Stand to one lucky winner! In order to enter be sure to leave a comment HERE on my blog AND on the Designer Crafts Connection Blog.

    To see all the fabulous projects from our teams start out on the Designer Crafts Connections page and hop from there.


    This is a sponsored post. Deflecto has provided product in exchange for my creative ideas, views, and opinions.


    Mermaid Baby Clear Frame

    Mermaid Baby Clear Frame

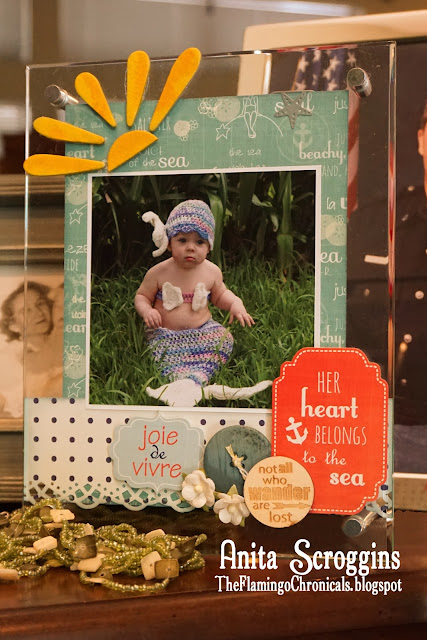
    I am ashamed to admit that I have turned into that grandmother that everyone runs from. Yep - I always have a photo of my beautiful grand daughter to hand and I am ready to show it to you at a moments notice. Since I have so many I am always needing a new way to show them off. I love these clear, beveled edge frames from Deflecto®

    Today I using the 5X7 Beveled Edge Frame - it holds a 5X7 photo (or mat) with plenty of room to spare. The frame is two pieces so your photo floats in the middle. This makes it really easy to switch your photos out frequently.

    For this project I used paper and die cut stickers from the new Julie Nutting line. I used an older Martha Stewart punch across the bottom of the polka dot paper strip.
    PS: This fabulous 4x4 print is from Persnickety Prints. They are good quality and a nice price.

    Embellished clear photo frame.
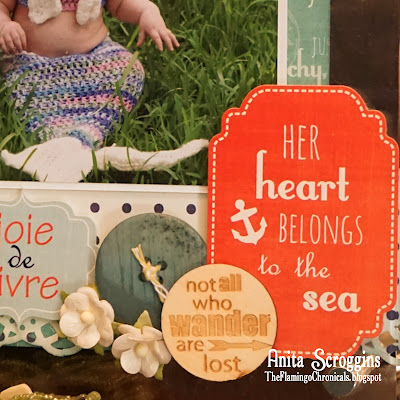
    I used a wood token from Maya Road, die cut stickers to match the paper line, and some paper flowers to embellish the front of the frame.

    This chipboard is from my stash (seriously it is one of the very first sets I bought a loong time ago). I painted the pieces using using DecoArt Media Fluid Acrylics. I have found that a low temp glue gun is the best way to adhere pieces to the outside of the frames - it grabs instantly and holds well.


    Are you Social? We are! Be sure to check us out sometime.

    Patriotic Mini Canvases

    Patriotic Blocks mantle decor

    It's time to decorate for 4th of July and I always like to display a little something cute on the top of my piano (really it's to keep the cats from laying there). I picked up these 4" pre-printed canvas blocks at Michaels, along with some Joy 3" Varsity Block Letters.

    supplies for mantle decor
    In addition to the blocks and letters I used a variety of embellishments from my studio. Blue Fern Studios Chipboard, Maya Road bling, DecoArt Antiquing Creme and Metallic Lustre, Art Anthology mini Doilies, and twine. 

    mantle decor canvas block patriotic

    Using antiquing cream on the surface gave the blocks the aged look I wanted, then I added a the Metallic Lustre using a sponge for highlights.

    decorated canvas block

    Each block was decorated with a variety of bits and pieces to give them some visual interest. The chipboards were inked with VersaMagic and then I added highlights with a white pen.


    Everything, including the letters, was adhered using my SureBonder low-temp glue gun. The little red flower is from Maya Road too.

    TIP: Did you know that if you have little "strings" from your hot glue on your project that giving them a little shot with a heat gun melts them away?