Sparkle N Sprinkle November Reveal

Welcome to Sparkle N Sprinkle's November 1 Reveal.


This month FIVE new stamp sets are being introduced.   These sets are 20% off their regular price, until November 3rd.  All the new reveal sets are available on Cling Mounted Rubber and as a digital image.  Finn's Scarf, set #671 is the stamp set featured in  This Month's Technique Video.


The sets are:


Christmas Doves #649   (digi version DIGI649)
Brighten the Holidays #663   (digi version DIGI663)
Finn's Scarf #671  (digi version DIGI671)
Birthday Friends #673   (digi version DIGI673)


On Nov 3rd,  one Grand Prize Winner will be selected from the comments left on the designers' blogs listed below.  The Grand Prize Winner will receive


all FIVE of the new rubber stamp sets (or digi sets, if you prefer)


The new SNS Creative Challenges also begins today, with lots of prizes and recognition badges. 


The winner of the blog hop will be announced on Nov 3 on Facebook, the SNS blog, and on our blogs.  This month's Blog Hop order is:


(Tip: if you have a problem with a particular link, try clicking on the person's blog title to send you to their Home page.)


Don't forget to leave a comment with each Designer to be eligible for the Grand Prize.  We love reading your comments and hope we have inspired you as well.  If you absolutely can not leave a comment for some reason, please email icinganne@yahoo.com with your comment and the name of the blog or Designer you are commenting about.

We hope you enjoy the New Reveals as much as we do!
Last month the winner came from Belinda's blog.  Wonder which Designer contains the Grand Prize winner this month?


Here are a few of the products I used on my layout:


To see all the details on my layout, hop over to
My Gallery on Sparkle N Sprinkle.

Thanks so much for stopping by!
Anita


Halloween Decor with Smoothfoam

Good morning everyone! Today I want to share to fun Halloween project with you using a Scrapbook Mount Page from Smoothfoam.


I painted the surface black and then inked the edges to make them darker.

I used my Cameo to cut the phrase and  added detailing with markers.

The bat's faces are done with paint pens so they have a little extra dimension. I folded the wings before I adhered them to the project.

Thanks so much for stopping by today!
Anita


Halloween Banner and More Deflecto Crafts Fun

Even though we don't have any kids at home this year, I just can't seem to stop making Halloween projects- strange I know. This morning I have a very quick and easy little Halloween Banner to share with you.

I used an American Crafts DIY Shop precut pennant banner for the base and cut some glitter cardstock to layer on top. The letters I have had forever- and I mean forever. They came in a class kit a zillion years ago and I have been needing to use them up on something! Ditto for the cute little wooden shapes- I can't even remember where I bought those I have had them SO long.  I used Metal "S" Hooks from Deflecto Crafts to attach the banner pieces together, using a pair of pliers to flatten the hooks a bit. 

 I used the amazingly fabulous Sign/Banner Hangers from Deflecto Crafts to add the banner to my mantle. These little things are seriously handy and I want to know where they have been all my life!

On another note, we have been doing a fair amount of remodeling in the house of late and I got something that will help me when I am out shopping for new decor.

 I used the Flexible Pouches and Metal Pear Clip Merchandiser, cut index cards to fit, then punched small squares from my paint samples for each room. On the back of the cards I have written my room dimensions and window sizes. This way when I am out shopping I can make a decision if I see something I like!

This past weekend I had a wonderful time teaching art workshops at Girl Scout Camp. I brought along some Deflecto products to make displaying my samples a bit easier.

 This super handy little VersaGrip Magnetic Sign Holder stuck right to the side of my supply bucket in the middle of the table so everyone could see what we were working on.


 I used a 4X6 Photo Frame to display the class name and attached a VersaGrip Double Sign Holder to the top to show off another sample.  I added my business cards next to them in the Grab A Card Holder.


Anita


Halloween Goodies using Deflecto

Howdy everyone! It is almost time for the mini spooks to come out, are you ready? 
I have some special people to give goodies to this year and wanted something fun to dress my trays up with this year. I had some fun new things from Deflecto Crafts to play with and inspiration struck!

First off, I never had a ay to get my recipe up off the counter where I don't splatter everything under the sun on to it- that drives me nuts. Because I am such a messy cook, I always copy the recipe from the book and use the photocopy to actually cook from. I am always looking for a way to hold it at eye level near my mixer.

I pulled out the VersaGrip Spring Sign Holder from Deflecto and clipped it right onto my mixer. Perfect for holding my recipe at eye level!!

Next up I needed something to decorate my popcorn boxes so I grabbed the Flexible Sign Danglers and wrapped them around my bags. I had something special I wanted to add to them- did you notice that the ends are self adhesive??

I bought these candy eyeballs because they are just the cutest things I have ever seen! 
They are perfect to add to the ends of my danglers to finish off the boxes.

 I always like to label the goodies on my trays so I added the Supergrip sign holders to the tray on the inside to hold my tags. These amazing little things are self adhesive as well and snugly hold a single sheet of paper. 

Here is a look at the tray all dolled up- super cute yes? 
I have a couple more to do and then I am off to deliver them in the morning. 


Be sure to stop by the Deflecto Craft Facebook Page to see all the fabulous 
things our Ambassador Team is doing.

Anita

Halloween Popcorn Box Blog Hop

Welcome to the 
2014 Halloween Popcorn Box Blog Hop Party!

I am so happy to be joining in the group of talented artists to share
our creations. Thanks to Laura Kelly who put the who thing together,
and for the cute goodies she sent!

I decided to use my box to share some actual popcorn!
Every year I make loads of caramel corn and I thought this would look super
cute filled with some yummy, sweet corn.

 I have used Wet-Erase Sign from Deflecto Crafts along with the included white pen to make my card.

My image is Witches Brew 660 from Sparkle N Sprinkle and I have colored it with 
PITT® Pastel Pencils from Faber-Castell®.

The little black kitty is from the same stamp set. The flowers and buttons are from my stash.

We have a great prize up for grabs on the hop!
A $50 Fandango Movie gift card, a pack of popcorn boxes from World Market and
 $45 of iLTC/craft supplies to decorate with.

Thanks so much for stopping by today!
Anita


a Rafflecopter giveaway


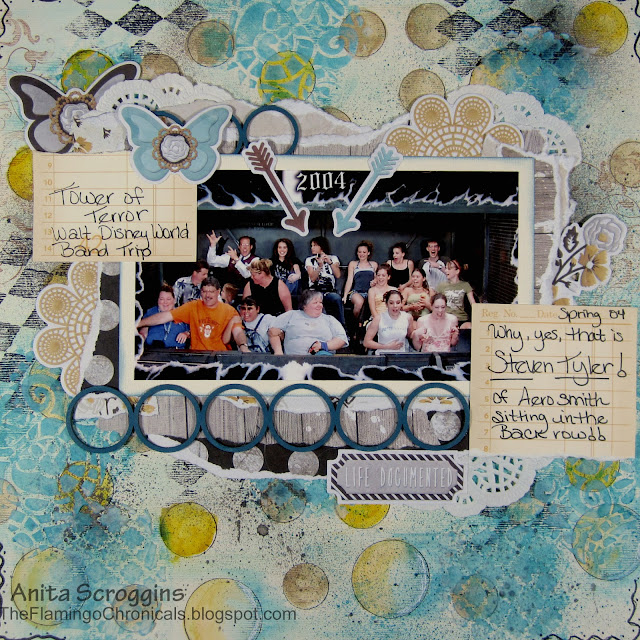
The Deconstructed Layout #16- Tower of Terror


Tower of Terror layout
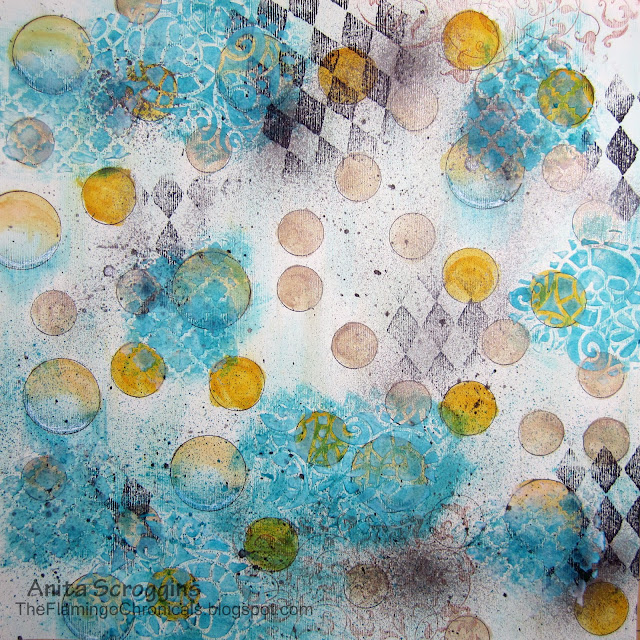
In today's Deconstructed Layout we are all about the background!Today my project is about making your own background. I have used a plain piece of solid cardstock and altered it using stencils, Gelatos®, PITT® Pastel Pencils, ArtGRIP® Aquarelle Watercolor Pencils, stamps, spray inks, and molding paste.


http://theflamingochronicals.blogspot.com/p/deconstucted-layouts.html

To see the whole series of Deconstructed Layouts click on the logo.

stenciled background

For the base layer I used a 12x12 stencil and filled in the circles using watercolor pencils, Gelatos, and pastel pencils. I then outlined all the circles with a fine tip black pen - one that won't run when sprayed with water! I moved the stencil and sprayed lightly with water so make the watercolors run in a few places. I also added a few sprays of ink here and there. 

stamped background
The next layer is some simple stamping. I used an old background stamp that I bought years go - it's a basic shape that works well on pretty much everything. Next up is a layer with stencils and modeling paste. When the paste was dry I used a damp sponge and Gelatos to color it. This method also deposits a bit of color in other random places so beware. 

stencil texture
Here's a close up of the colored paste. You can see how the color is uneven and leaves some areas of the paste white. The very last layer on the background was to add some shimmer spray. It's hard to see in the photo but it's just visible at the top of the beige circle. 

Here are a few close ups of the layout. 

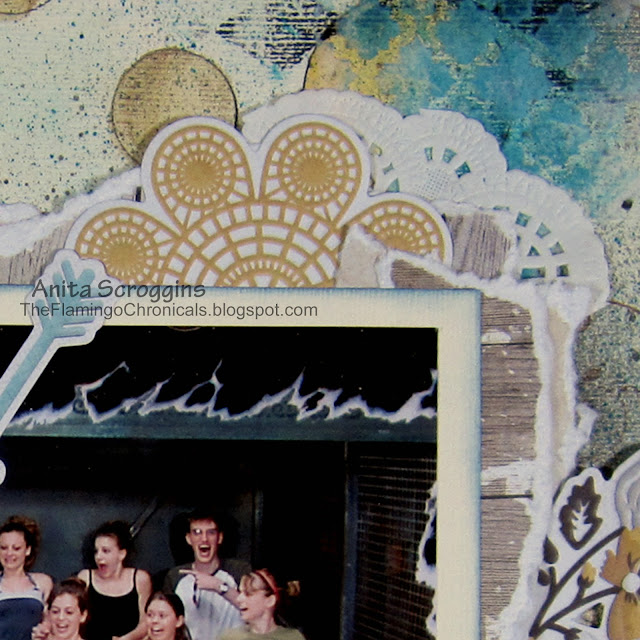
lots of layers
I used lots of layers under my photo for added visual texture. 

using layers
Lots of layers here too - eight layers total at the corner of the photo. Because they are all flat layers it doesn't add any really bulk to the layout so it will still slip easily into my albums. 

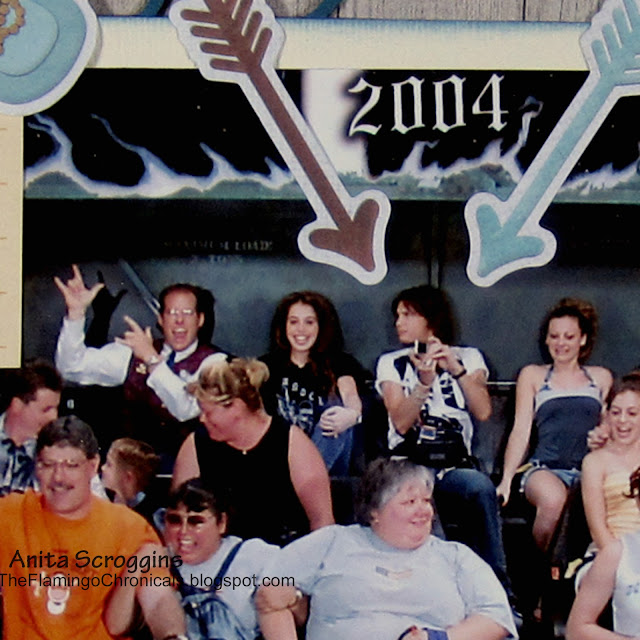
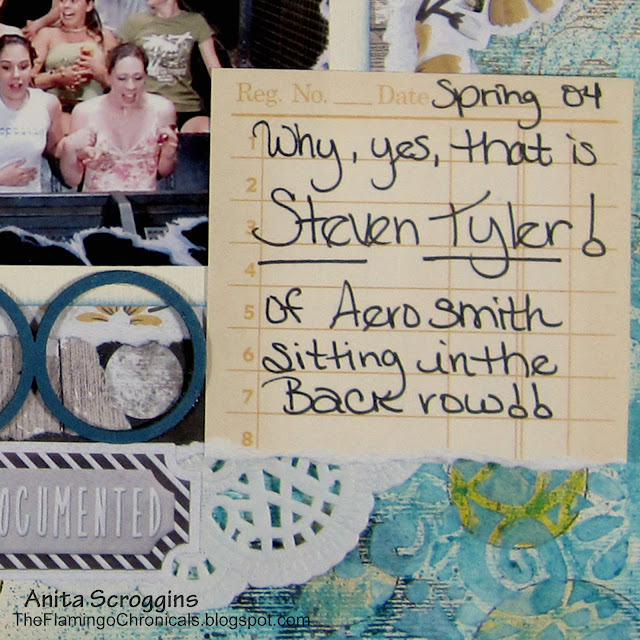
Steven Tyler riding along
Yeah,,, that's Steven Tyler in the back row. 

Journal card

I always add journaling to my layouts in my own hand writing.  I started scrapbooking to tell stories and I just can't do a layout with out telling the story! If you want to know why you should use your own hand writing, rather than a printout, on your layouts, see my post here on why it is so important.


Mixed media layout
Way back in the day, when I was a Band Mom, we went to Walt Disney World one year for competition. As a group of us were standing right at the front of the line to get on the Tower of Terror, who should walk right up to the front of the line but Steven Tyler of Aerosmith!


If you would like to see more of The Deconstructed Layouts
the entire series is shown HERE.


Visions of Sugar Plums December Journal

Hi everyone, it is Friday! 
Yippee!!

It has been a long and stressful week and I am glad the weekend is here
at last. I did manage to get some crafting time in and I wanted to share 
some sneak peeks of one of my upcoming classes

For the past several years I have made a December Journal, or December Daily,
for one of my Christmas Classes and this year is no exception.

I am pretty excited about this new album, I put a lot of techniques in this
album and we are going to have a great time at class!

For the album itself we will be using a Maya Road 8x8 chipboard album and altering it
using stencil, molding paste, and spray inks. I didn't add many decorations to the 
cover because I really wanted the texture of the cover to show through. 
I added a lot of hangy things to the spine including some handmade items and some
strung beads.

Inside the album I have used the new Graphic 45 'Twas The Night Before Christmas
line of papers and embellishments. I have used lots of pockets, 
tags, fold outs, envelopes and other spaces to hold all of your Christmas
memories and tidbits. 

This class will be held on November 16th, at 1:00pm
(this is a Sunday) and will have a limit of 15 students only.

Registration will be open this coming week and you can register

Anita


Halloween Fun with Sparkle N Sprinkle

Hello everyone! I hope you are enjoying your long weekend.

Today I have another layout to share with you for Sparkle N Sprinkle
using some fun new Halloween Stamps.
I have very few Halloween photos of my little ones, so the ones I do have are so precious to me! They were 3 and 5 here. I have used the new Authentique papers for this layout and I love that little border of witches that I used right behind my photo!

For my title I have used Camera Life and heat embossed it with Concord Star.

I used the Witches Brew stamp set and the same EP for my sentiment. I used Clementine EP on the middle layer of my die cuts. To add a little sparkle to my border I used Purple Rain GL and 1/8" Tear-ific Tape. For the double layered hexagons, I applied 2 1/2" Tear-ific Tape to my paper, punched it out, burnished with Cloud Nine GL, and adhered with foam tape.

For my border I did some punching, layering and sewing with my machine.

I used Flourishes 2 in the corner and heat embossed with Detail Black EP.  I added a spritz of silver spray ink.


To see all the details and products used, hop over to

Thanks so much for stopping by today!

Anita


Creative Costumes with Oly*Fun

Hi everyone! Today I have a fun project to share with you. 
I was given the opportunity to create with oly*fun from Fairfield World  and it is super easy
 to work with I must say! I have included some information on it at the bottom of my post, so be sure to check out all the fun things you can do with it!

Our theme is Creative Costumes so of course I wanted to make something cute for our new grand daughter. Did I mention how amazingly cute she is???

Anyway, when I saw the colors I thought of flowers, and my daughter wanted something with sun flowers. Since sweet Skylar is not big enough to actually Trick-or-Treat this year, she will just be hanging out looking cute in her costume.

I started with a cute onsie to match the theme. To make the ruffle of petals around the neck, I drew two petal patterns on paper and cut them out using Snow White and Lemondrop. I stitched two layers of Lemondrop petals on the neckline, overlapping the petals, then added the Snow White petals on top.  I added detail to the petals using my Tombow markers.


I used Fabri-Tac to adhere a cute brown ruffle ribbon from my stash, and sewed a trio of buttons on to complete the flower neckline.

For the stem, I folded Kiwi to form a three layer thickness and basted down each side. I folded in thirds again, and whip stitched the edge closed on the back side. I used a simple running stitch to attach it to the garment and added some fun ric-rak on top using Fabri-Tac. 
For the leaves I die cut the fabric using a Tim Holtz die. 

See, cuteness overload!

Be sure to check out all the creations over on the Fairfield Blog  
Polyfil can be found in most major craft, hobby and big box retail stores.
Oly-fun is available from Hancock Fabric, Fabric.com and though http://shop.fairfieldworld.com/c/oly-fun and various other sites.

Our Social Sites
https://www.facebook.com/FairfieldWorld
http://fairfieldworld.com/blog
http://www.pinterest.com/fairfieldworld/
http://instagram.com/fairfieldworld


Thank you so much for stopping by!
Have a wonderful weekend

Anita


Introducing Oly*Fun – “The everything material”

This is one of the the easiest, most versatile materials you will ever find.You can sew it, glue it, staple it, pin it or tie it
You can write on it, paint it, embellish it, stamp it or stencil it
You can scissor, rotary, or die cut it
You can use it as fabric or use it as paper
You can use it indoors and outdoors
The only thing it won’t do is fray, tear, or fade so don’t bother hemming it.

SOLID COLOR THROUGHOUT Use both the front and back - no white core or back side 
GREAT VALUE A good value solution for holiday and event decorating, costumes, kids projects and activities NO FRAYING Easy sew, no hemming required WATER RESISTANT Ideal for a wide variety of indoor and outdoor uses
Project and Content Creation Ideas:
Works inside and out and is very economical, so it’s a great alternative for PARTY CRAFTING – and canbe used instead of paper or tissue for many projects. It’s more durable than papers – wont crease,wrinkle or tear quickly in wind or from hyper kids - and it won’t disintegrate when in contact with water.CREATIVE GIFT WRAPPING – To sew or not to sew – that is your question – use basic folding and wrapping techniques or more complicated origami to create beautiful, unique and durable gift wrapping.Vibrant colors can be used as is, or can be stamped, stenciled, or painted on with a variety of materials.If you can make it in Felt, you can make it in Oly*Fun – but it will be more weather and water resistant with a more tailored look and feel.
Easy to die cut for Bulletin Board art, school projects, and all sorts of teacher / student projects.


Easy to sew – this is a great material for beginner sewing – there is no grain, no selvedge, no sizing, no fraying.... Just so easy.
Essentially all school spirit color combinations are included in the 18 color palette of Oly*Fun – make spirit pom-poms, spirit cuff bracelets, bleacher cushions, ponchos, etc for your students and community.Can make a great fundraiser – easy to make by kids and families – reasonable cost and lots of value when sold before a big game!

What exactly IS oly*fun? oly*fun is a specially engineered material that features some of the best things about fabrics AND papers.
How do I sew it? Very easily! There is no grain to oly*fun, so you can cut it any which way you want.There is no need to pre-wash, as there is no sizing or shrinkage. Use a simple stitch to attach pieces together, and hem only if you want. oly*fun will not fray.
Do I need to pre-wash it? There is no sizing in oly*fun, so there is no need to prewash.
When it needs cleaning, how should I wash it? It’s best to wash on gentle cycle and air dry.
Can I iron it? Yes, but carefully. Use only a cool or low iron with a pressing cloth.
Can I use it outside? Absolutely! oly*fun is weather resistant –so water rolls right off.
Can I glue it? Yes! oly*fun glues best with Fabric Glue such as FabricTac or Aleene’s Tacky Glue. A hot Glue gun works great too. It’s best to test the glues before kicking off a big project.
Can I die cut it? Yes! oly-*fun runs through any pressure style die cutters like Sizzix, or Accu-cut. It will work with a digital die cutter if a stabilizer is used.
What other ways can I cut it? Use scissors, rotary cutters or paper cutters with a rotary style blade.It’s best to test before kicking off a big project.
Is it flammable? No. oly*fun is not flammable, it will melt if exposed to flame.
How is oly*fun sold? oly*fun is sold on bolts and in quick grab and go packages. The bolted material is60 inches wide and can be cut to whatever length you like. The grab and go package is 20 inches wide and includes 3 yards of material.
How many colors does it come in? oly*fun comes in a rainbow of 18 vibrant solid colors. The colors can be mixed and matched to create projects for any holiday or season, and almost any sports team or school!


Deconstructed Layout #15 Timeless Memories


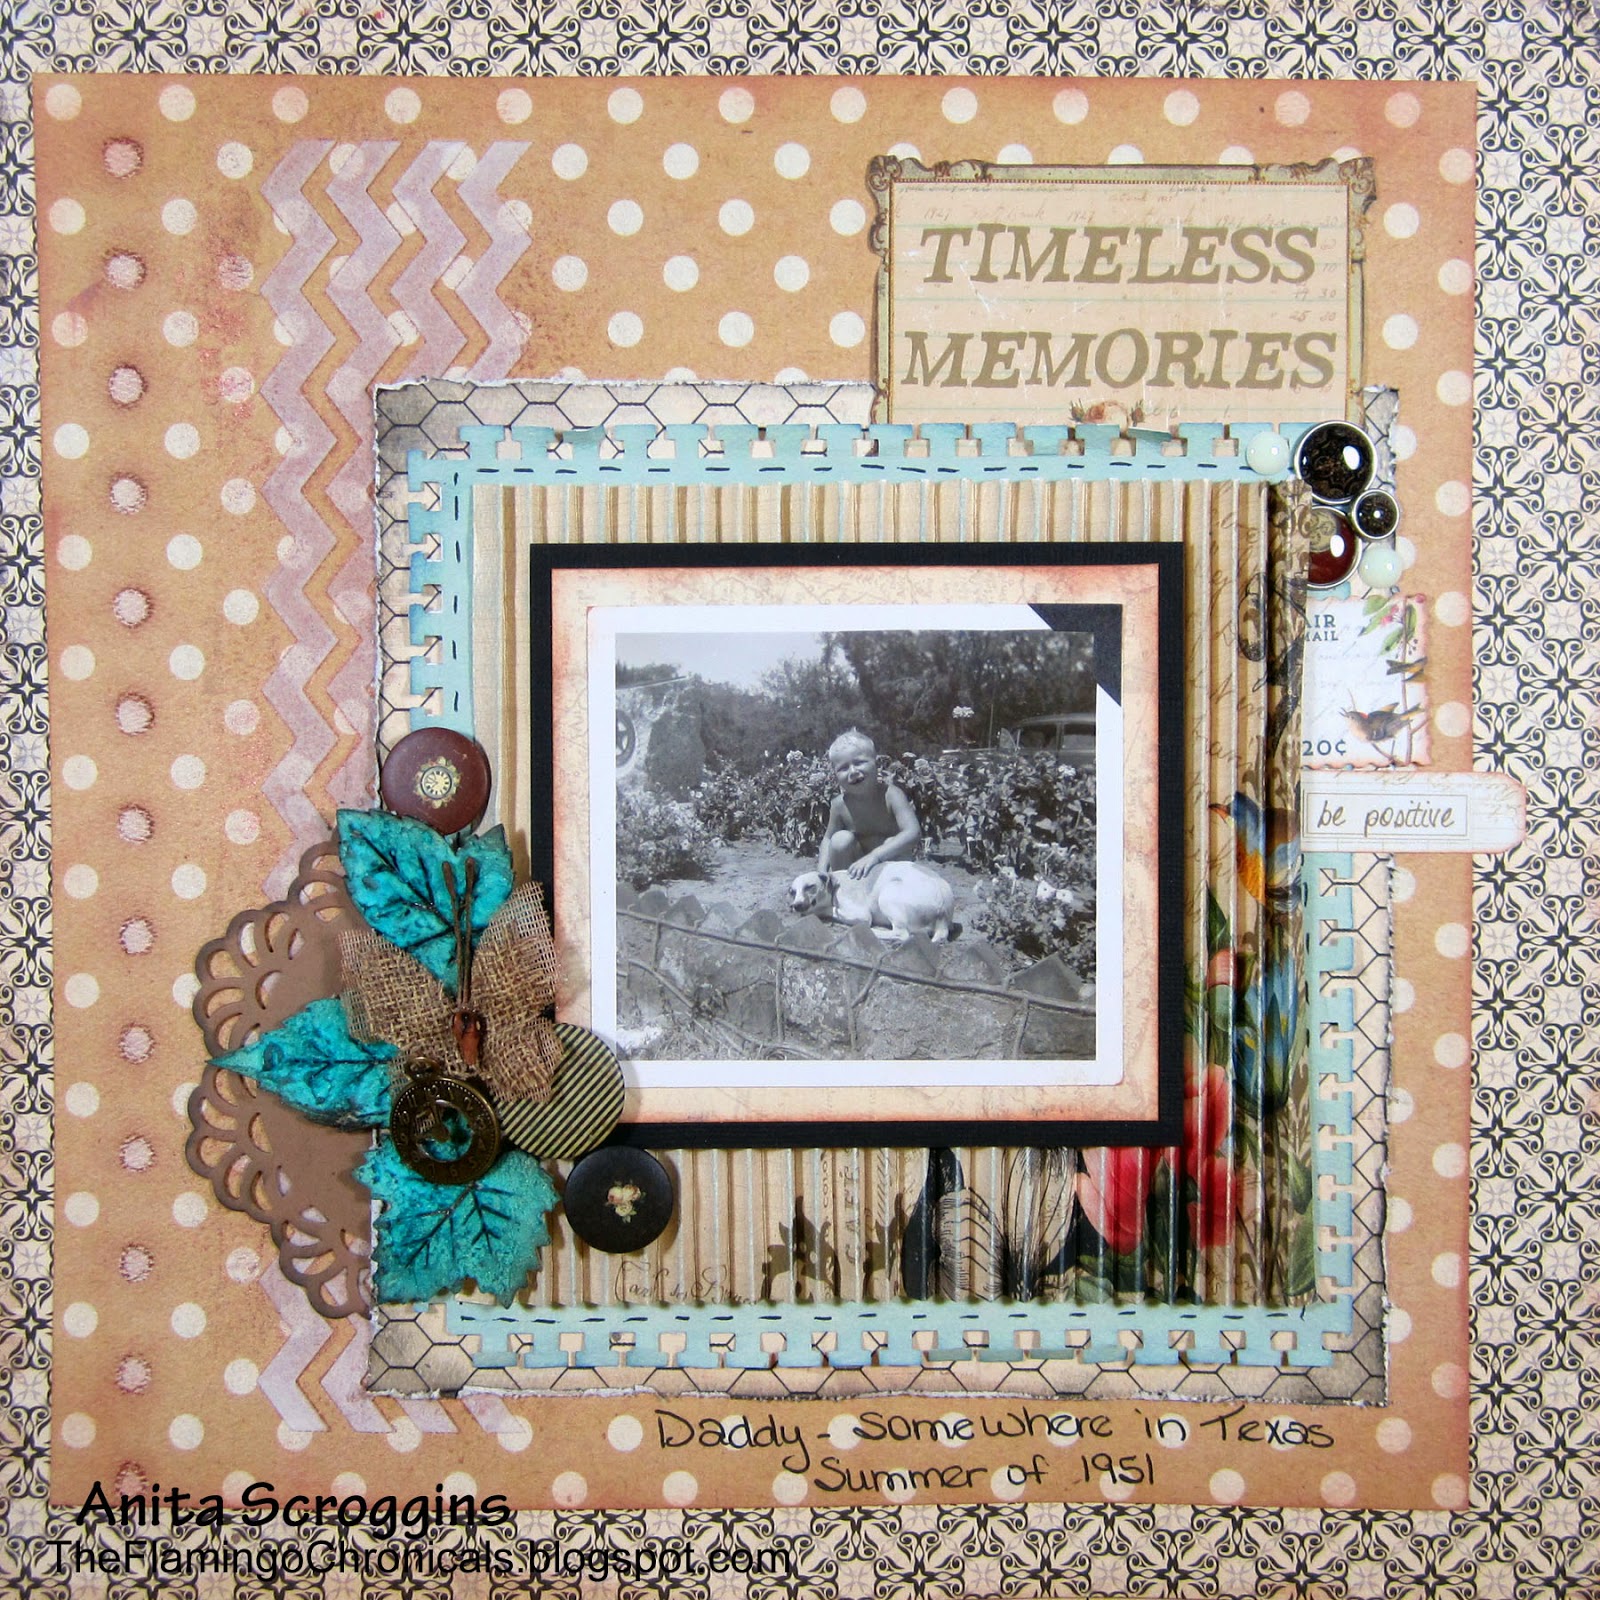
Timeless memories

Hi everyone, I'm here today to share a new Deconstructed Layout with you. Today's tutorial is on paper pleating, which is a great way to add some dimension and texture to your layout using just a plain piece of paper! I have had this photo of my dad for some time, but wasn't sure how I wanted to scrap it.Since it is a black and white photo, I didn't want to overwhelm the photo so the colors of these Authentique papers were great.


To see all the tutorials in the Deconstructed Layout serious check them out here.

paper scoring
I wanted to use this paper, with these accent colors, but I didn't want the pattern on the paper to show. I decided to pleat the paper to distort the pattern.

paper pleating
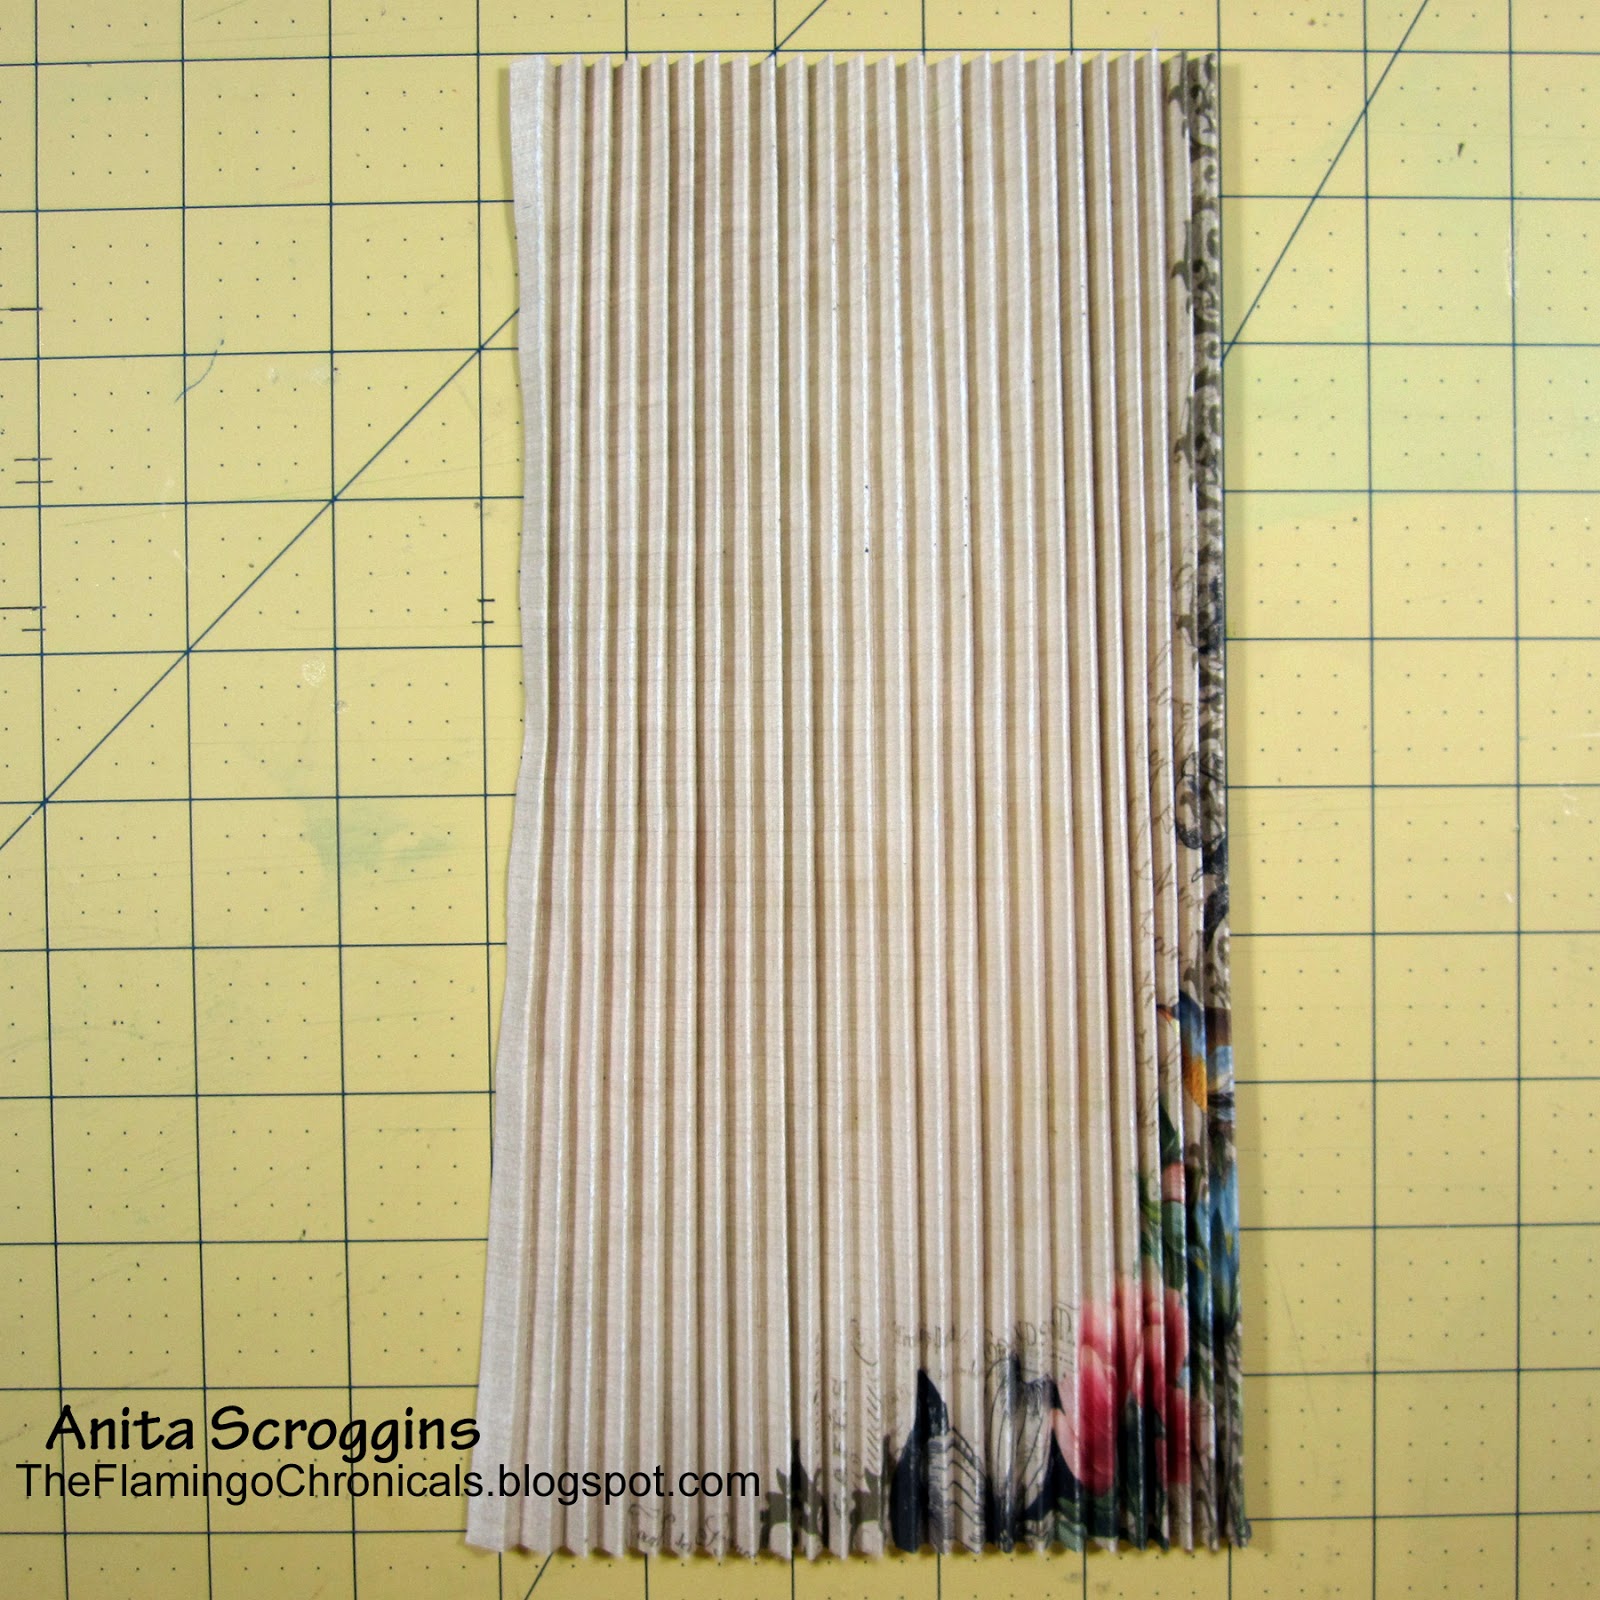
I scored the paper every 1/2", then flipped it over and scored on the 1/4" intervals between the first score marks. So the paper ended up being scored every 1/4", with every other score mark alternating front and back.  Now the fun really begins!

pleated paper
Accordion fold the paper until it is pleated all the way across.
(This is time consuming and takes some practice, I admit. I recommend that you start with some fairly thin paper and make the score marks further apart, maybe every 1/2" instead of every 1/4" to practice. Once you get a feel for it, then work on the paper you want to use on your layout.)

making a photo mat
You will need something extra strong to hold the pleated paper down, so I used Tear-ific Tape from Sparkle N Sprinkle. Any very strong double sided tape will work. 

vintage photo
I adhered the pleated paper onto several other layers of paper, then matted my photo and adhere it on top using more double sided tape. 

chipboard cluster
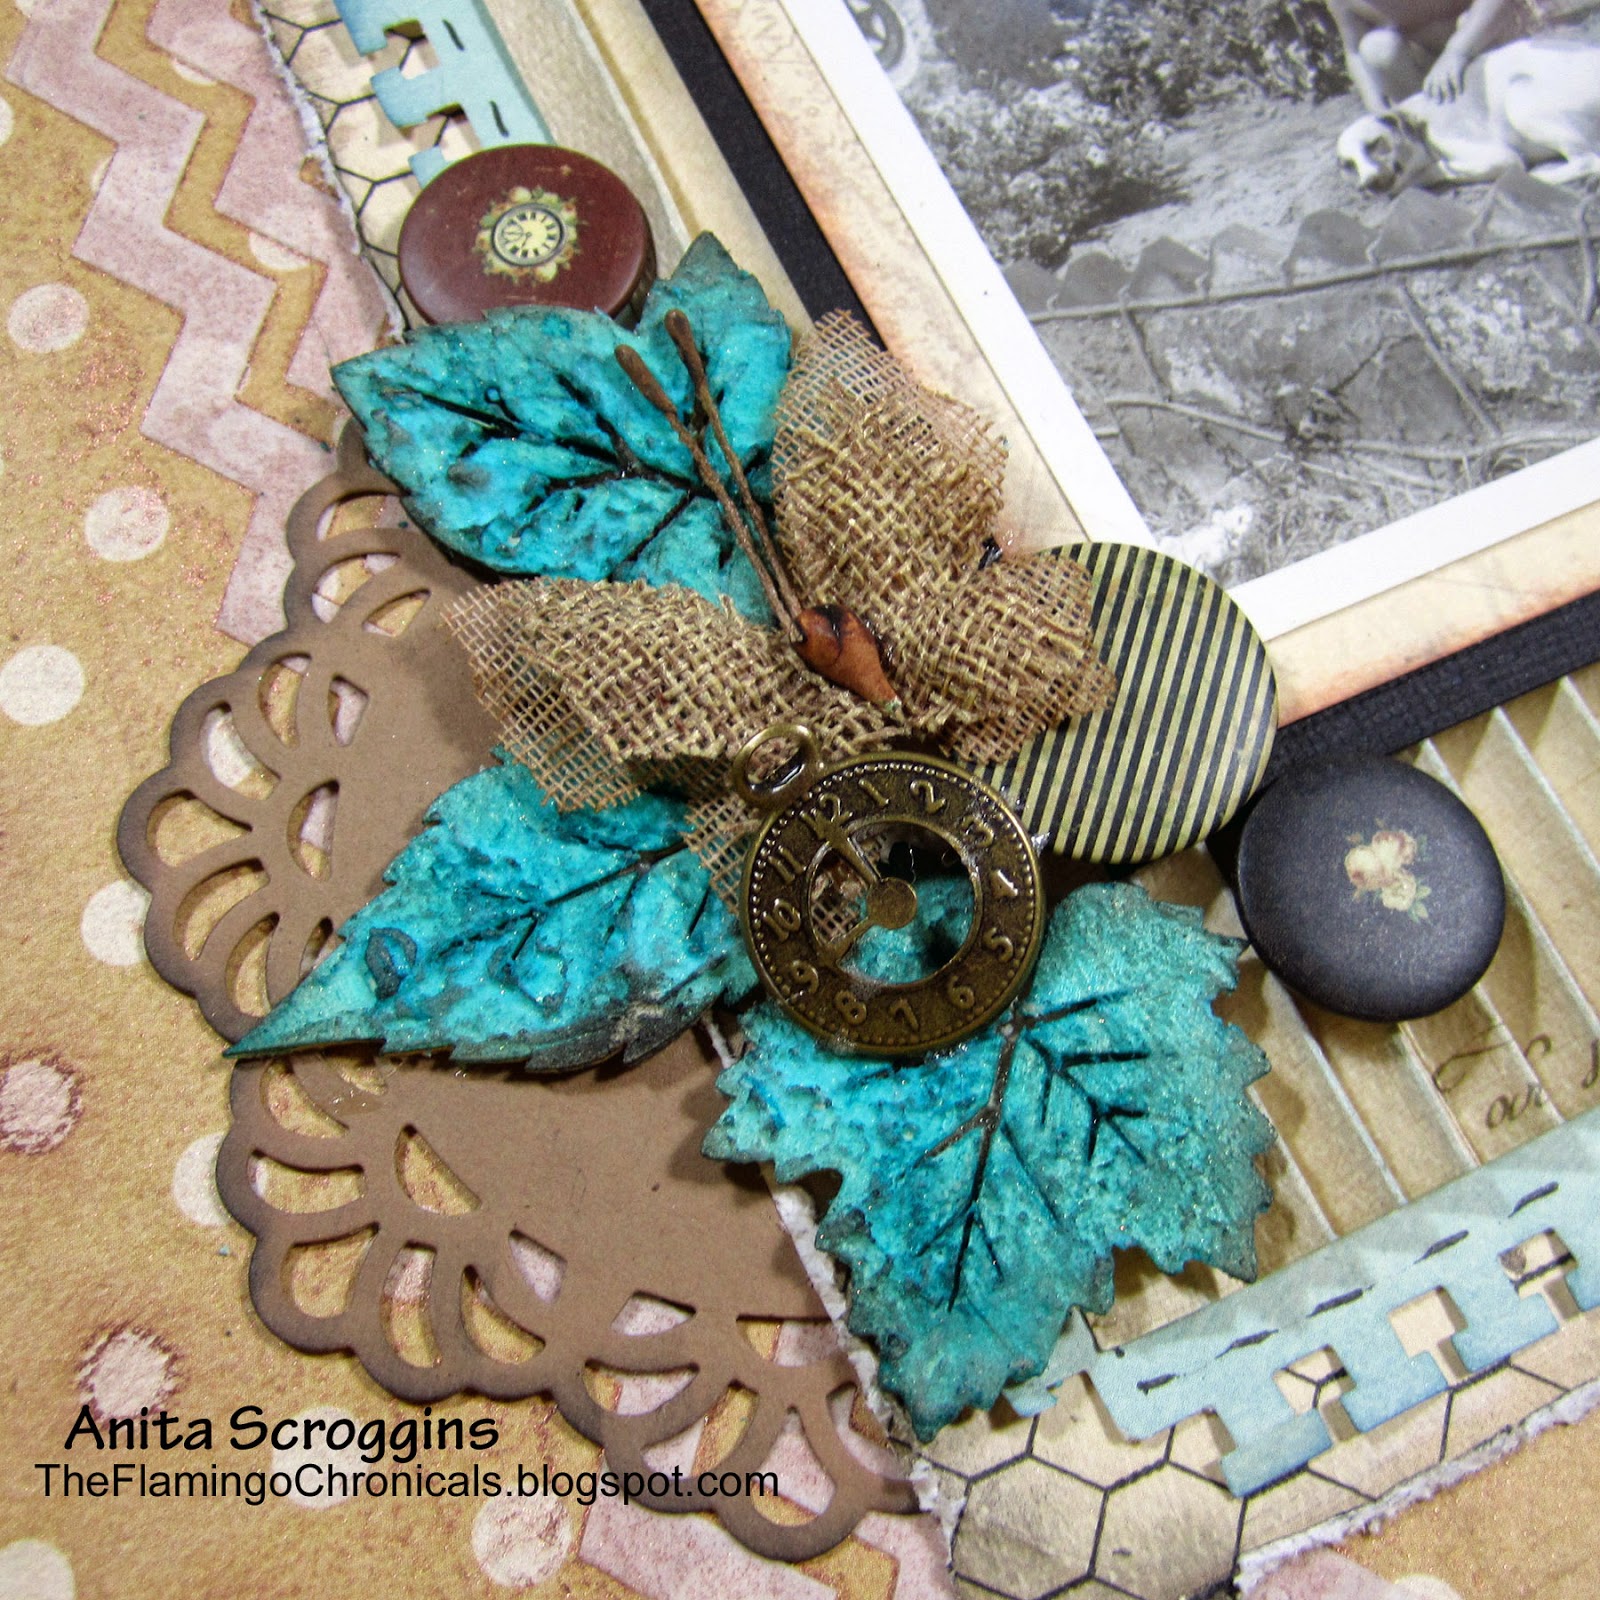
I used a variety of embellishments for my cluster. To color the wood leaves from Prima, I first covered with a layer of Molding Paste, using my paint brush to give it some texture. Once it was dry I used Time Travel Teal from Lindy's Stamp Gang Industrial Chic Magicals Set to color them. 

I hope you give this technique a try! It takes a little practice, but it is a great tool to have in your bag once you get the hang of it.